

Selecting HTML Elements with CSS
Introduction
The basic functioning of CSS is based on two important concepts: layering (cascade) and specificity.
Layering determines the order in which CSS rules are read and applied.
Specificity tells the browser which element to target and which style to prioritize.
The starting point for this process is the selector — defining “which HTML element” to format.
As the web page grows, it becomes necessary to use more specific selectors to maintain layout and apply correct styles.
Simply put: writing good CSS starts with choosing the right elements correctly.
Choosing the right element and giving it appropriate visual styles is the basis of writing CSS.
When you want to change the appearance of an element on a web page, you do so through selectors.
This guide will help you develop more aesthetic and professional websites by teaching you how to choose the right element in the right way.
First, you'll learn how to use the type selector to format HTML elements.
Next, you'll see how to apply more targeted styles by combining multiple selectors.
Finally, you'll discover how you can give the same style to different elements by grouping multiple selectors.
In short, this chapter will not only teach CSS selectors; It will also broaden your perspective on the design process.
Preparing the HTML Structure
In the first step, you will create the HTML structure that you will apply styles to throughout this tutorial.
The goal here is to prepare a sample page for different elements and situations — that is, to create a basis for CSS practices.
Open index.html in your editor and add the following basic HTML skeleton.
This structure will provide the necessary starting codes for your page:
<!DOCTYPE html>
<html lang="tr">
<head>
  <meta charset="UTF-8">
  <meta name="viewport" content="width=device-width, initial-scale=1.0">
  <title>CSS Seçiciler Eğitimi</title>
  <link rel="stylesheet" href="styles.css">
</head>
<body>
  <h1>Sürdürülebilir Gelecek İçin Adımlar</h1>
</body>
</html>
In the HTML structure above, the <link /> tag already loads the styles.css file.
So you should make sure that the styles.css file is available in the same folder.
Now let's add some content to our page.
We'll start by adding a header and an article inside the <body> tag.
<body>
  <header>

  </header>

  <article>

  </article>
</body>
The relationship between the tags <body> and <header> is called the parent and child relationship.
Because the tag <header> is inside the tag <body>.
Likewise, the tags <header> and <article> are siblings,
because they are both at the same level, i.e. under the same parent tag (<body>).
Now let's add a child element inside the <header> tag to give the page a title:
<header>
  <h1>Sürdürülebilir Gelecek İçin Adımlar</h1>
</header>
Let's add four child elements inside the <article> tag: one <header> and two <section> elements.
The <article> tag serves as a landmark in browsers.
This makes the page structure more understandable, especially for people using accessibility technologies.
There must be only one <header> tag within a landmark.
In this example, that <header> tag will contain the title of the article.
The next three <section> tags will contain different blocks of information.
<article>
  <header>

  </header>

  <section>

  </section>

  <section>

  </section>

  <section>

  </section>
</article>
Now, let's add a title to the tag <header> in <article>.
It makes sense to use the tag <h2> here because this title is right below the main title of the page, <h1>.
Also, to emphasize the word “Sustainability”, let's highlight it with the tag <strong>.
This text won't look any different yet when you open the page in the browser — because the browser is currently using default styles.
We will make this title more visually distinct with CSS in a moment.
<article>
  <header>
    <h2><strong>Sürdürülebilirlik</strong> ve Geleceğimiz</h2>
  </header>
...
</article>
Now let's add the first section content.
This section will consist of two paragraphs, each within the tags <p>.
Let's write a brief explanation about the subject "Coral Reefs".
We will use the tags <em> (italic emphasis) and <strong> (bold emphasis) to highlight some statements in the first paragraph.
<section>
  <p>
    <strong>Mercan resifleri</strong>, okyanus ekosistemlerinin en zengin ve en hassas yapılarından biridir.
    <em>Binlerce deniz canlısı</em> için yaşam alanı oluştururlar ve denizlerin doğal dengesini korurlar.
  </p>
</section>
In the second section, we will add a special title to this section.
We will use the tag <h3> here because this title will be a sub-topic of the previous title <h2>.
We will also highlight part of the title with the tag <strong>, just like we did with <h2>.
In this section we will also create an item list.
We will use the tag <ul> to identify the list and the tag <li> to identify each item.
To specifically highlight one of the items on the list, we will highlight it with the label <strong>.
...
<article>
  <header>
    ...
  </header>
  <section>
    ...
  </section>
  <section>
    <h3><strong>Mercan Resiflerini</strong> Korumak İçin Neler Yapabiliriz?</h3>
    <ul>
      <li>Plastik kullanımını azaltmak</li>
      <li><strong>Denizleri kirletmemek</strong> ve atıkları doğru şekilde imha etmek</li>
      <li>Sürdürülebilir turizmi desteklemek</li>
      <li>Doğal yaşam alanlarını koruyan projelere katılmak</li>
    </ul>
  </section>
  ...
</article>
...
In the last section part, we will create a structure similar to the previous section.
Again, we will add a title <h3> and highlight a word within the title with the tag <strong>.
But this time we will use an ordered list.
We will use the tag <ol> to define the list, and the tag <li> to identify each item.
To highlight one of the items on the list, we will once again highlight it with the label <strong>.
...
<article>
  <header>
    ...
  </header>
  <section>
    ...
  </section>
  <section>
    ...
  </section>
  <section>
    <h3><strong>Doğayı</strong> Korumak İçin Atabileceğimiz Adımlar</h3>
    <ol>
      <li>Geri dönüşüme önem vermek</li>
      <li><strong>Enerji tasarrufu</strong> sağlayan ürünler tercih etmek</li>
      <li>Toplu taşıma veya bisiklet kullanmak</li>
      <li>Yerel üreticileri desteklemek</li>
    </ol>
  </section>
</article>
...
Don't forget to save your file.
With this step, we have completed the entire HTML structure that we will use in this tutorial.
Now we have a solid foundation on which to apply CSS styles.
Keep the index.html file open — we'll use it as a reference in the following steps.
Then, open the file in your browser to see how it applies your browser's default styles.
The page will look pretty plain now; Headings will be bold, lists will be bulleted, and text will be in black tones.
We will soon customize this view completely with CSS and make it much more stylish.
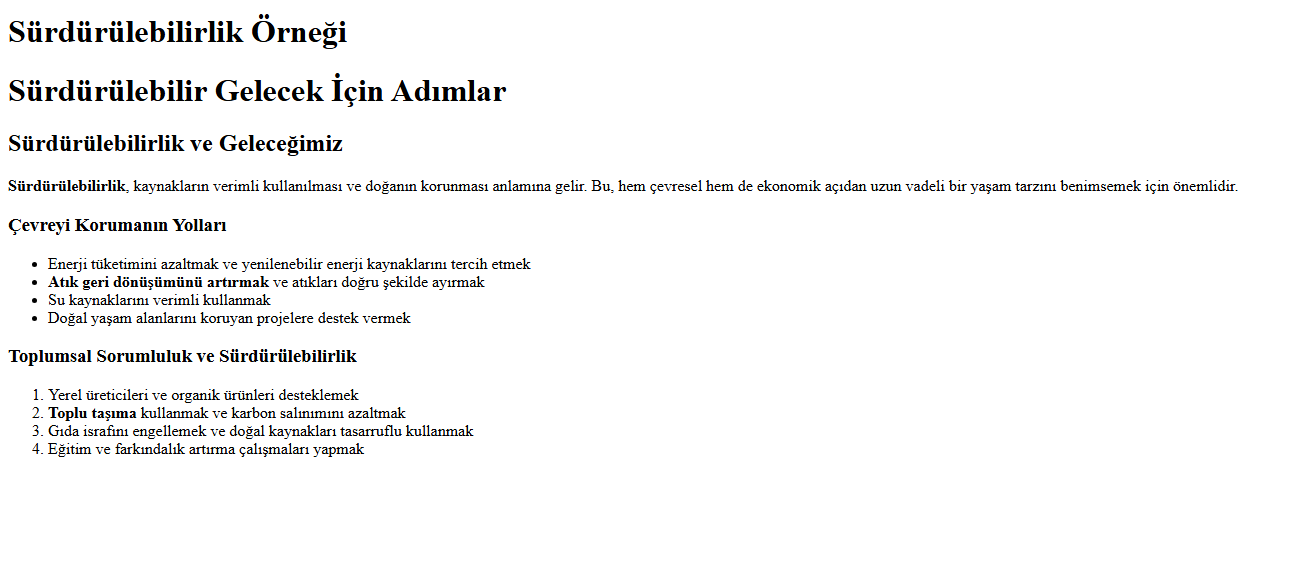
Now we will make the appearance of the page more aesthetic by applying styling to your HTML page.
Selecting Elements with the Type Selector
In this section, we will work with the element selector, or more commonly known as the type selector.
The type selector finds elements on the page by tag name and is the broadest selection tool in terms of specificity.
That is, the type selector targets each element in the HTML page with a specific tag name.
In this section, we will write several different types of selectors on the index.html page. Thus, we will better understand the scope of this selector and how it is used.
First, open the index.html file in the browser.
Check out how it looks with browser default styles.
These default styles are styles preset by the browser to provide visual information to page content.
The browser applies basic styles to basic elements like headings, paragraphs, lists, etc. — but these styles are usually pretty plain and simple.
This would be a good place to start with styles.
In the following examples, we will customize this default view with just a few CSS properties.
So, the basic structure will be here, but we will make adjustments to make the page more elegant.
Now, open the styles.css file in your editor.
By default, browsers usually use serif fonts. Serif is the name given to the decorative details at the ends of letters, such as in the Times New Roman font.
To change the font for the entire page, you can change the font only once.
For this, we will create a type selector targeting the body tag.
body {
  font-family: sans-serif;
}
Save your changes and refresh the browser after saving the styles.css file.
Verify that all text on the page converts to the browser's default sans-serif font.
The reason this change appears on the entire page is the inheritance feature in CSS.
Inheritance is when a child element inherits property values from its parent element — unless specified otherwise, of course.
This property does not affect all CSS properties, but is very noticeable on text-related properties.
Now, let's make the headings (h2 and h3) more normal:
The browser applies a bold style to h2 and h3 headings by default.
To change this situation, we will create a type selector for h2 and h3 and add the font-weight: normal property to each of them.
This will convert the titles to a regular weight font instead of the default bold font.
body {
  font-family: sans-serif;
}

h2 {
  font-weight: normal;
}

h3 {
  font-weight: normal;
}
Save your changes and refresh the index.html page in your browser.
You will see that the h2 and h3 headings change from bold fonts to normal font weight. However, text in the <strong> tag will continue to be bold.
This is due to the fact that the <strong> tag has a certain value for font-weight by default in the browser.
That is, <strong> tags do not inherit the inheritance property from their parents (in this case h2 and h3).
The main purpose of the design is to make communication more efficient. In this example, we are trying to highlight certain content by creating a contrast with the font weight of the headings.
Now, we'll add color to make this contrast even more pronounced.
em {
  background-color: yellow;
}

strong {
  color: red;
}
Save the file styles.css and refresh your index.html page in your browser.
You can follow these steps to see the design changes on the page:
- All text converted to sans-serif font.
- h2 and h3 headings now appear to be normal weight, not bold.
- The texts in the label
<strong>are highlighted in red. - The background of the texts in the label
<em>is yellow, meaning the highlight effect has been applied.
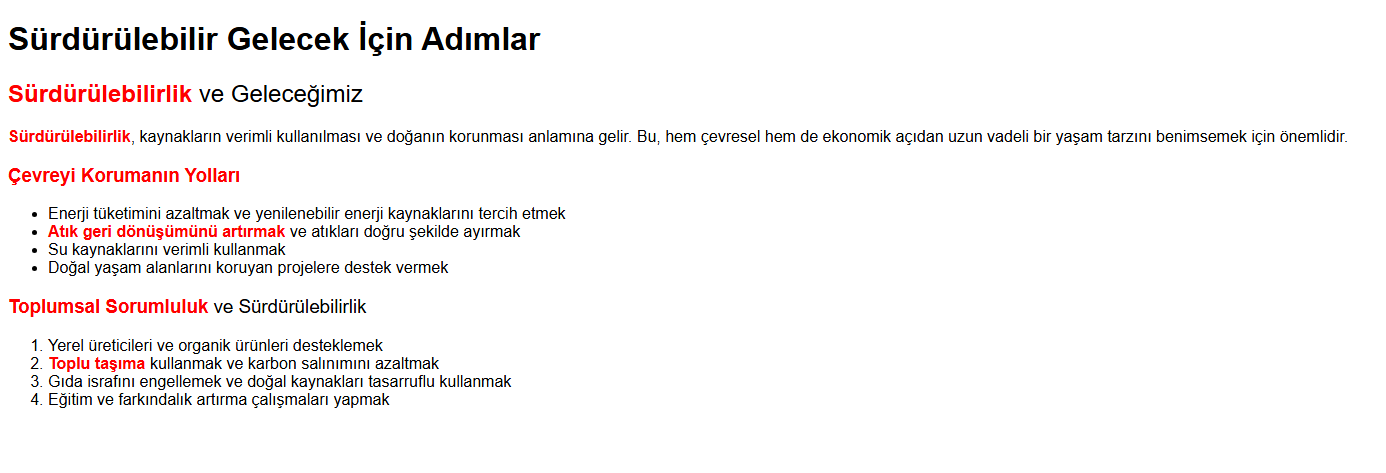
In this step, we worked with different type selectors and created specific styles for each selector.
The type selector tells the browser to find an element by the name of the element and is the broadest selection tool in terms of specificity.
Now you'll learn how to use selector groups to make your CSS simpler and more organized.
By using selector groups, we can apply the same style properties to multiple elements, thus making the code more efficient.
Selecting Elements with the Combinator Selector
In this section, we will work with the combinator selector to make more specific element selections.
This selector selects the appropriate element using nested relationships of HTML elements.
We will use this selector to make the same element type appear differently within different element types.
Open the index.html file in the browser.
When you look at the style properties, you will see that every <strong> element on the page is colored red.
This is due to the color: red; attribute being applied to all <strong> tags.
In this step, we will change the color of the <strong> labels only under certain conditions.
For example, <strong> items will have a different color than other items they are found in. So, we will customize the color of the <strong> labels based on the elements they are in.
A combinator selector is defined by adding a space character between the selectors, and the HTML hierarchy is read from left to right.
The selector on the right is the targeted element. This structure can be simple or complex to provide the necessary specificity for the targeted element.
To understand how Combinator selectors work, open the styles.css file and add the following code to the bottom of the file:
p strong {

}
This is the combinator selector and targets <strong> elements, descendants of <p>.
This means that <p> does not have to be a direct parent of <strong>. That is, <strong> can be at any level inside <p>.
Now, let's change the color of the <strong> elements that meet these criteria.
Using the Combinator selector, we will add a color property to the <strong> elements.
This is the combinator selector and targets <strong> elements, elements inside <p>.
That is, <strong> can be at any level inside <p>.
Now, let's change the color of the <strong> elements that meet this criterion.
Using the Combinator selector, we will add a color property to the <strong> elements.
p strong {
color: green;
}
Save your changes and refresh the index.html page in your browser.
After the refresh process, you can see that the <strong> elements inside the <p> elements are green.
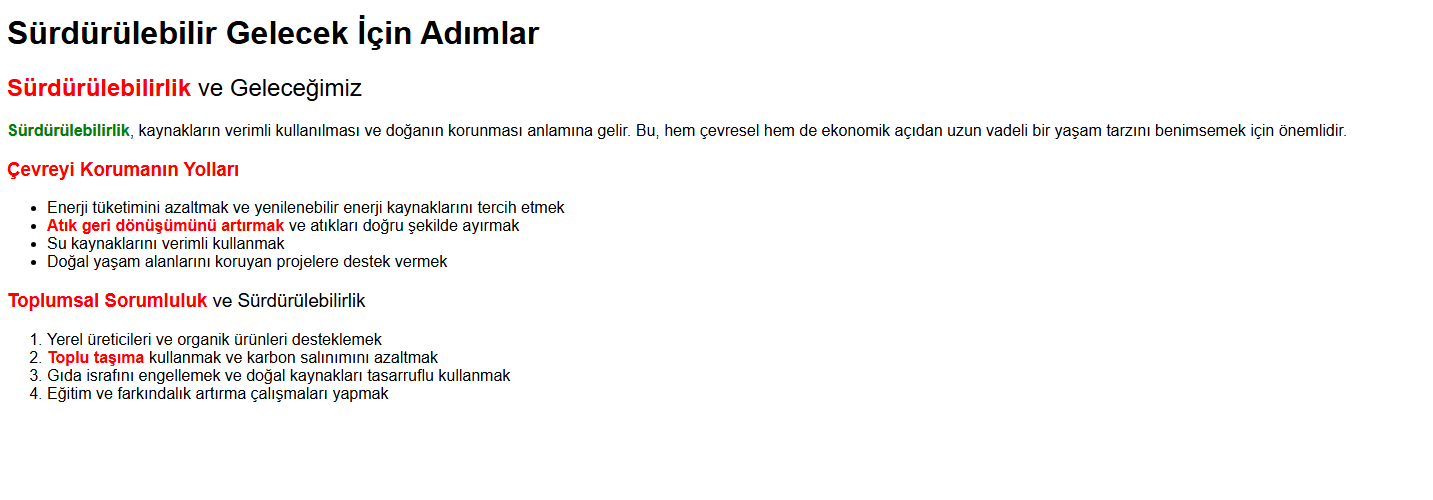
Now let's add more color variation to the <strong> elements throughout the file.
First, let's target <strong> to the elements inside the <h3> tag and make these elements blue.
To do this, we can add the following CSS code using the combinator selector:
h3 strong {
  color: blue;
}
Finally, let's change the colors of the <strong> elements to add some more color.
First, let's set the color of <strong> elements in <ul> (unordered list) to yellow,
and then let's change the color of <strong> items in <ol> (sorted list) to green.
We can simplify this process as follows:
ul strong {
  color: yellow;
}

ol strong {
  color: green;
}
Go back to your browser and refresh the page.
<strong> in the unordered list is now colored rich light blue,
and <strong> in the sorted list will be green.
These changes indicate that the colors yellow and green have been successfully applied to your page.
You can observe these color changes by refreshing the browser.
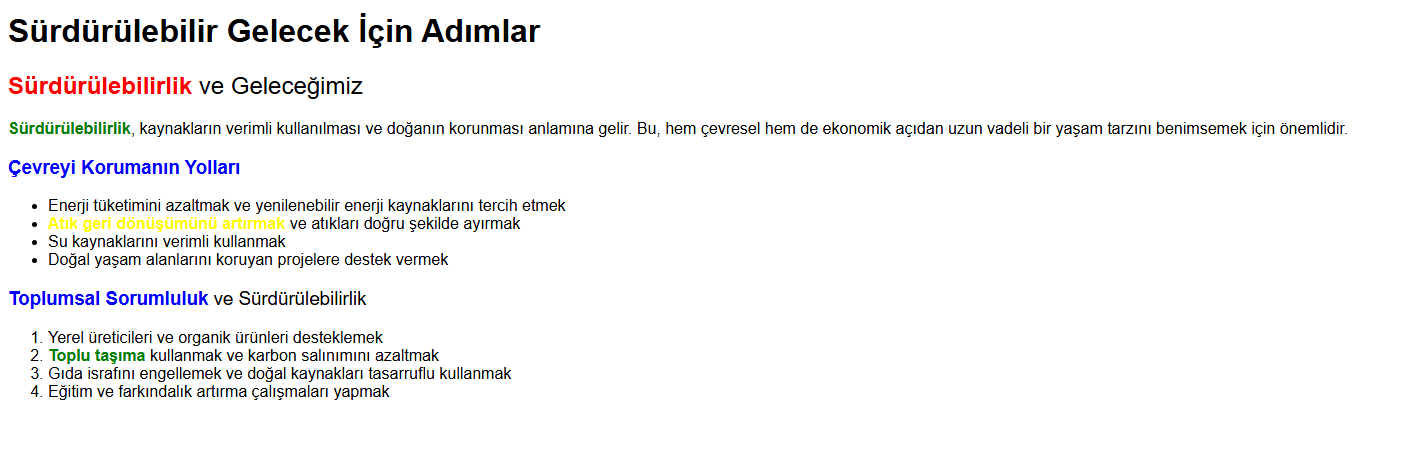
In this section, you learned about the combinator selector.
You have used this selector several times, along with two types of selectors, to apply custom colors to different instances of <strong> elements.
In the next section, you'll learn how to make your CSS simpler by using the selector group.
This method allows you to apply similar styles to multiple element types and makes your CSS code more efficient.
Using a Selector Group to Select Multiple Elements
In this section, you will select HTML elements using selector set.
There is a principle in programming called "Don't Repeat Yourself" (DRY).
The goal of DRY code is to write more maintainable and maintainable code.
Selector group is one of the fastest ways to apply the DRY principle when writing CSS.
Open the styles.css file in your editor.
In the previous part of the tutorial, you wrote two styles to change the browser default bold font weight to normal:
...
h2 {
  font-weight: normal;
}

h3 {
  font-weight: normal;
}
...
Since the type selectors h2 and h3 contain the same property and value, these two styles can be combined with a selector group.
Selector grouping is done by placing commas between selectors.
In this case, you can remove the h3 selector block, then add a comma at the end of the h2 selector block and add the h3 selector.
It may be helpful to put each selector on a new line to improve readability.
h2,
h3 {
  font-weight: normal;
}
Open your browser and refresh the index.html page.
There must have been no change in the style of the page, because the titles h2 and h3 now share the same styles, thanks to the selector block.
However, you don't have to keep the styles the same for both titles.
You can apply unique styles to each element using the individual h2 and h3 type selectors.
h2,
h3 {
  font-weight: normal;
}

h2 {
  color: darkblue;
}

h3 {
  color: brown;
}
Refresh the index.html page in your browser and you will see that the headings h2 and h3 still have the same normal font weight but the color properties are different.
Selector groups are not limited to just selectors of a particular type, and you can apply the same style by combining selectors of different types.
You can use this feature in as many different ways as you want.
Now, let's add a combinator selector to the selectors we discussed earlier and include it in the selector group h2 and h3.
...
h2,
h3,
ol strong {
  font-weight: normal;
}
...
When you refresh the index.html page in your browser, you will see that (<ol>)** <strong> in the **sorted list is no longer bold and has normal font weight.
This shows that the combinator selector is working correctly and the <strong> elements have been styled to font-weight: normal;.
You can observe these changes in the browser.
In other words, <strong> items in the sorted list will no longer be bold and will appear with normal weight.
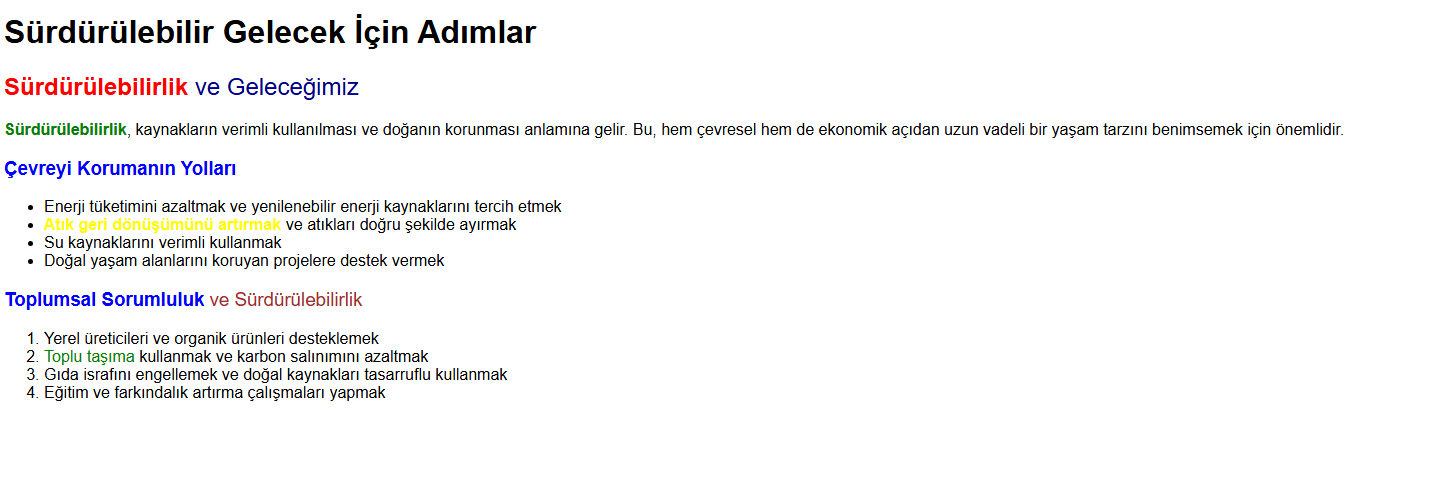
Note: Using a selector group, you can combine different styles into a single selector block. However, it's important to strike a balance between DRY (Don't Repeat Yourself) CSS and human-readable CSS. Best practice is generally to take a readability-first approach.
To take an extreme example, although it is possible to write all style properties with a single group selector, this can be challenging for developers to understand.
In this case, developer readability should be preferred.
Writing regular and understandable CSS that developers can easily understand increases maintainability and maintainability in projects.
In this section, you worked with the selector group to combine repeated CSS properties into a single selector block.
You have also written highly specific and reusable properties using the combinator selector with the selector group.
This method is very useful for making your CSS more efficient and writing in a more organized way.
By using the selector group and the combinator selector, you have made your page style more flexible and maintainable.
Result
In this tutorial, you learned about the basic selectors needed to write CSS.
Now you can effectively find an element deeply embedded in HTML with CSS and apply specific styles to it.
You also learned the DRY (Don't Repeat Yourself) programming principle, which is useful for writing shorter and more manageable CSS.
These selectors can be combined with many other CSS selectors to target and style the element and state you want.
Using these methods, you can write your CSS more efficiently and sustainably.