

Adding JavaScript to HTML for Beginners
Login
In this article, we will learn three basic ways to add JavaScript to HTML files:
- Insert directly in
<head>, - Add in
<body>, - Connecting to an external
.jsfile.
We will talk not only how to add it, but also why different methods are preferred. We'll see how it affects performance, the importance of browser caching, and the difference between modern features like defer and async.
We will proceed step by step together, so we will understand both the technique and its logic.
This guide will also include real-life examples to combine theory with practice.
For example, we will see step by step how to make a dark mode button or validate a form.
In the final part, we'll learn basic best practices for writing clean, maintainable code. We will also have a small guide explaining how to solve common mistakes made by beginners by using the developer console of the browser you are using.
In this way, we will both understand the theory and be equipped to start your first web projects with confidence.
Highlights
- The best way to add JavaScript is to use an external
.jsfile. This makes editing, maintenance and reuse much easier. - Using the tag
<script>in<head>is the worst option you can make in terms of performance because it prevents the page from loading and shows the user a blank screen. - Using the
deferfeature in external script files is the most modern and high-performance approach recommended today. - External JavaScript files gain speed thanks to browser caching; This advantage does not exist in inline scripts.
- A single
.jsfile can be used on multiple pages, making updates and maintenance much more efficient. - The most important tool for resolving JavaScript errors is the Developer Console in the browser. We can open the Developer Console by pressing the F12 key.
In short, the most logical way to make our work easier and increase performance is to choose external files and use defer.
Method 1: Adding Script Into <head>
A special HTML tag <script> is used to add JavaScript code to the HTML document. This tag wraps the JavaScript code you write. The <script> tag can be used either in the <head> section or in the <body> section. This depends on when you want the code to run.
In general, keeping code within <head> separates it from the actual content of the page, providing a more organized structure.
Now, as an example, let's look at a simple HTML document with the browser title "Today's Date":
<!DOCTYPE html>
<html lang="tr">

<head>
    <meta charset="UTF-8">
    <meta name="viewport" content="width=device-width, initial-scale=1">
    <title>Bugünün Tarihi</title>
</head>

<body>
</body>

</html>
To create an alert, we can add a <script> tag just below the <title> tag and write our JavaScript code. Like the example below:
<!DOCTYPE html>
<html lang="tr">

<head>
    <meta charset="UTF-8">
    <meta name="viewport" content="width=device-width, initial-scale=1">
    <title>Bugünün Tarihi</title>
    <script>
        let d = new Date();
        alert("Bugünün tarihi: " + d);
    </script>
</head>

<body>
</body>

</html>
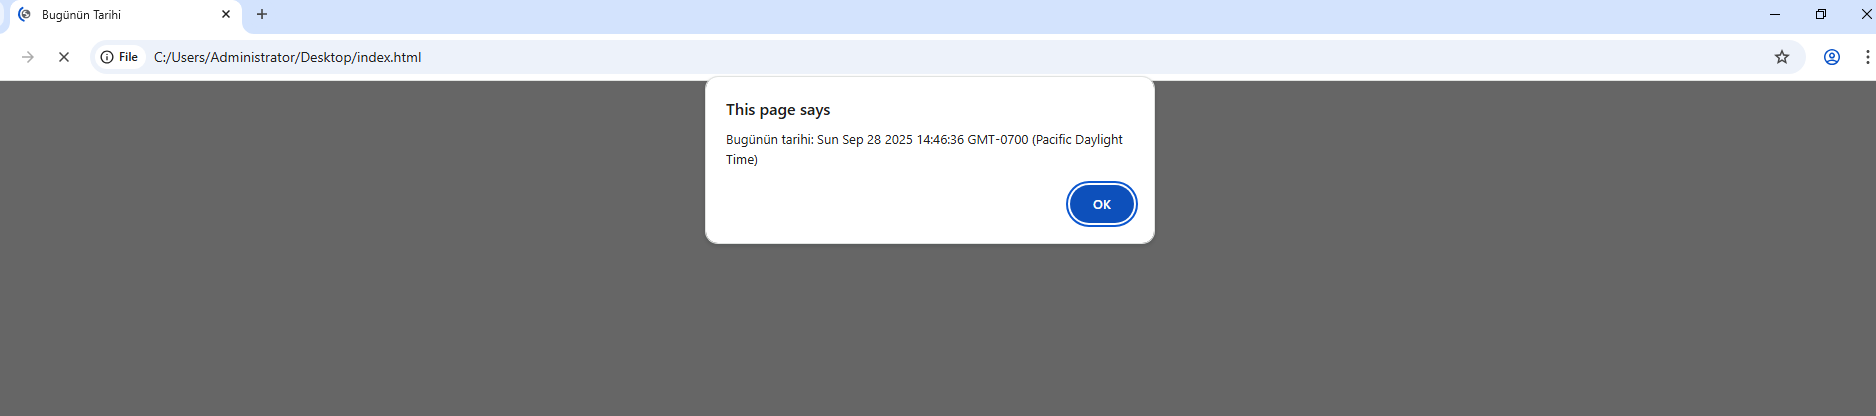
Putting the script inside <head> tells the browser to do the following: run the JavaScript first, then start rendering the content inside <body>.
That's why a warning message appears before the page loads; The script runs before the user sees the content.
Method 2: Adding Script Into <body>
The tag <script> can also be used in the <body> section. When it is located here, the HTML browser stops when it reaches that point and runs the script.
This method is preferred for JavaScript code that must immediately find and replace an HTML element on the page.
A common best practice is to add scripts just before the closing </body> tag.
When you do this, all HTML elements on the page are processed by the browser and become available in the DOM.
This method also improves the performance of the page: The browser first shows the text and images, the user sees the page content; The JavaScript code runs afterwards. This way, the content appears on the screen without waiting for JavaScript to run.
Now, let's use this method to print the date directly into the HTML body, namely <body>.
<!DOCTYPE html>
<html lang="tr">

<head>
    <meta charset="UTF-8">
    <meta name="viewport" content="width=device-width, initial-scale=1">
    <title>Bugünün Tarihi</title>
</head>

<body>
  <script>
      let d = new Date();
      document.body.innerHTML = "<h1>Bugünün tarihi: " + d + "</h1>";
  </script>
</body>

</html>
When the above HTML document is run in a web browser, its output will be similar to the following:

Small scripts or codes that will only work on a single page can be written in the HTML file and generally do not cause any problems.
But as the script grows or becomes used on many pages, embedding the code directly in HTML becomes very inefficient. It becomes both difficult to read and difficult to manage.
In the next section, we will see how we can add a separate JavaScript file to the HTML document.
Method 3: Working with a Separate JavaScript File
For larger scripts or codes that will be used on more than one page, the most effective and professional method is to put the JavaScript in a separate file with the extension .js.
You can then link this file to the HTML document with the <script> tag and the src (source) attribute.
The prominent pros of this method are:
- Separation of Duties: HTML establishes the structure, CSS sets the appearance, and JavaScript makes the page interactive. Having them all in separate files makes the project organized and understandable.
- Reuse and Easy Update: For example, you can link a file named
site-scripts.jsto all pages on your site. When you need to make changes, just edit this file. - Browser Cache: The
.jsfile is downloaded when the user visits your site for the first time. On subsequent visits, the browser calls the same file from the cache. This allows pages to load much faster.
Let's create a small web project to demonstrate how to link a JavaScript file to an HTML document.
In this project:
- script.js inside the
js/folder, - style.css inside the
css/folder, - It will be index.html in the main directory of the project.
project/
├── css/
|   └── style.css
├── js/
|   └── script.js
└── index.html
Now let's move our JavaScript code to script.js to display the date as an <h1> header:
let d = new Date();
document.body.innerHTML = "<h1>Bugünün tarihi: " + d + "</h1>";
Now let's edit the style.css file. Let's give the background a color and add some style to the title <h1>:
body {
    background-color: #0affda;
}

h1 {
    color: #070202;
    font-family: Arial, Helvetica, sans-serif;
}
Finally, we can link both our script file and our style file from index.html.
- For CSS, we use the
<link>tag in the<head>section. - For JavaScript, we add a tag
<script>with the propertysrcin<body>.
<html lang="tr">

<head>
    <meta charset="UTF-8">
    <meta name="viewport" content="width=device-width, initial-scale=1">
    <title>Bugünün Tarihi</title>
    <link rel="stylesheet" href="css/style.css">
</head>

<body>
    <script src="js/script.js"></script>
</body>

</html>
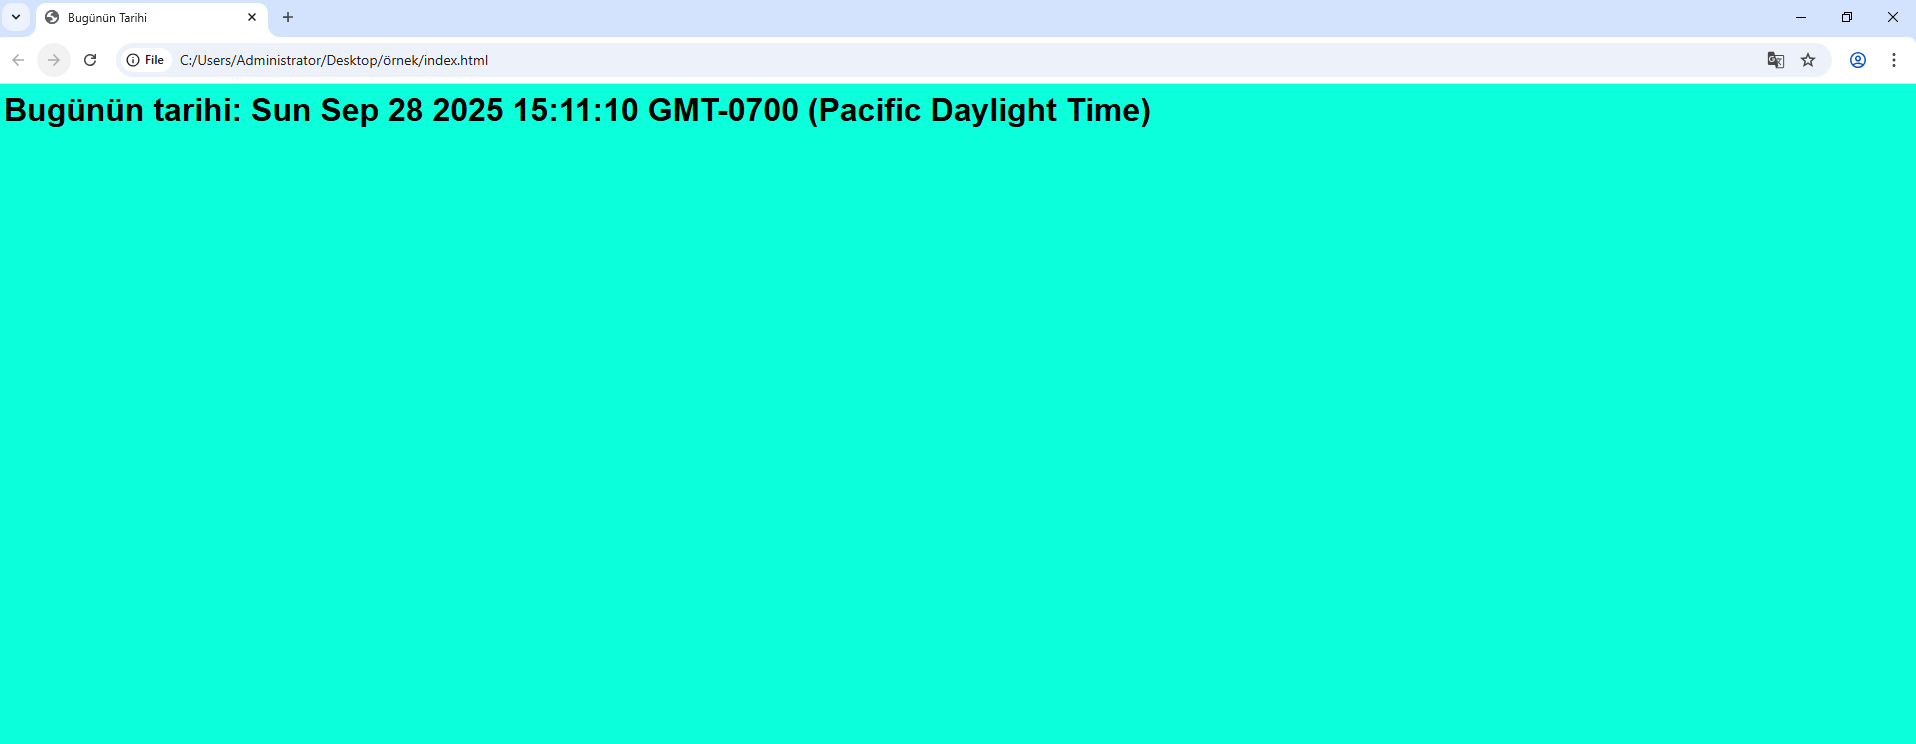
Now that we've added the JavaScript and CSS files, our project is much more organized.
When we open the index.html page in the browser, we should see a styled page showing the current date. The output will be similar to the following:
Codes Used in Real Life
Let's reinforce what we have learned so far through daily use.
How about taking a look at a few real-life examples?
1. Simple Dark Mode Toggle
Almost all modern websites and apps now offer a dark mode feature.
We can easily do this with JavaScript by opening and closing a CSS class.
HTML:
<!DOCTYPE html>
<html lang="tr">

<head>
    <meta charset="UTF-8">
    <meta name="viewport" content="width=device-width, initial-scale=1">
    <title>Karanlık Mod</title>
    <link rel="stylesheet" href="css/style.css">
</head>

<body>
    <button id="theme-toggle">Karanlık Modu Aç/Kapat</button>
    <h1 id="title">Başlık</h1>
    <p>"GenixNode Docs"a Hoşgeldiniz...</p>
    <script src="js/script.js"></script>
</body>

</html>
CSS:
/* Bu sınıf JavaScript tarafından eklenecek veya kaldırılacak */
.dark-mode {
    background-color: #222;
    color: #eee;
}
JavaScript:
const toggleButton = document.getElementById('theme-toggle');

toggleButton.addEventListener('click', function() {
    document.body.classList.toggle('dark-mode');
});
JavaScript first finds the button by its ID value.
Then, it waits for the click by adding an event listener.
When the button is clicked classList.toggle('dark-mode') works:
- If the
<body>element does not have the.dark-modeclass, JavaScript adds it. - If it already exists, JavaScript will remove it.
The browser also instantly applies CSS styles based on this class.
You can add a modern look by using it on your own website.
2. Basic Form Validation
On websites, users must fill out forms correctly.
Thanks to JavaScript, we can perform this check instantly, without refreshing the page.
HTML:
<!DOCTYPE html>
<html lang="tr">

<head>
    <meta charset="UTF-8">
    <meta name="viewport" content="width=device-width, initial-scale=1">
    <title>Form Doğrulama</title>
</head>

<body>
    <form id="contact-form">
        <label for="email">E-posta:</label>
        <input type="text" id="email" placeholder="ornek@eposta.com">
        <button type="submit">Abone Ol</button>
        <p id="error-message" style="color: red;"></p>
    </form>
    <script src="js/script.js"></script>
</body>

</html>
JavaScript:
const contactForm = document.getElementById('contact-form');
const emailInput = document.getElementById('email');
const errorMessage = document.getElementById('error-message');

contactForm.addEventListener('submit', function(event) {
    if (!emailInput.value.includes('@')) {
        event.preventDefault();

        errorMessage.textContent = 'Please enter a valid email address.';
    } else {
        errorMessage.textContent = '';
    }
});
The script listens for the submit event on the form.
The function runs when the user clicks on the “Subscribe” button.
- First, it checks whether the text in the email field contains
@. - If not, using
event.preventDefault()will prevent the form from being submitted normally and an error message will be displayed to the user. - If
@is present, no blocking is done and the form is submitted normally.
Best Practices
Here are some basic rules and tips to consider when using JavaScript in your HTML files:
-
Keep JavaScript in an External File: Instead of writing your code directly in HTML, always put it in the
.jsfile and link it with<script src="..."></script>. In this way, your code becomes more organized, easier to maintain, and the browser caches the file, allowing the page to load faster. -
Append Scripts with defer at the end of
<body>: For the best user experience, place the<script>tags just before the closing</body>tag and add thedeferattribute. This way, the content loads quickly and JavaScript doesn't block the page from appearing. -
Write Readable Code: Give descriptive names to your variables and functions (for example, do not write
calcinstead ofcalculateTotalPrice). Also, use comment lines (//) to explain “why the code was written”, not “what it does”. -
Do not repeat yourself (DRY): If you are writing the same code in more than one place, enclose it in a function. So you just call the function when necessary; Your code becomes shorter and easier to update.
Common Problems and Solutions
Don't worry if your script doesn't work! Your browser's Developer Tools will be your biggest helper.
- Press the F12 key on the keyboard (or right-click on the page and select Inspect).
- Click on the Console tab in the window that opens.
Most errors will appear here as red.
1- Error: Cannot read properties of null or is not defined
Meaning: JavaScript is trying to access an HTML element that has not yet been loaded.
Solution: Most often this error is caused by your<script>tag being in<head>or too high up in<body>.
Move the script just before the closing tag<body>and add the attributedefer.
2- Error: Uncaught SyntaxError
Meaning: There is a typo in your code.
Solution: The console usually shows you the line number. Carefully check for missing parentheses(), curly brackets{}, quotes""or similar omissions/errors in that line.
3- Problem: The script does not work, no error appears in the Console.
Meaning: Your HTML file probably cannot find your
.jsfile.
Solution: Check the Network tab in Developer Tools. If your script file is listed with a 404 error, your file path in thesrcproperty is incorrect. Double-check your spelling and folder structure (for example:<script src="js/script.js"></script>).
4- Problem: The code works but does not give the result I expect.
Meaning: This is a logical error. Even if the syntax is correct, the steps may be wrong.
Solution: Useconsole.log()to debug. Print the values of variables by placing them at different points in your code. So you can follow the logic step by step and see where it goes wrong.
let userRole = 'guest';
console.log('Kontrol öncesi kullanıcı rolü:', userRole); // Değerin ne olduğunu gör

if (userIsAdmin) {
  userRole = 'admin';
}
Result
In this guide, we learned how to add JavaScript to our web files.
We saw the differences between writing the script directly in HTML and using an external .js file.
As a result, we can say that using an external .js file is much more advantageous. Because:
- Prevents render-blocking problem with
defer, - improves performance thanks to browser caching,
- makes the code easier to maintain.
We also reinforced what we learned with real-life examples (such as dark mode, form verification).
We saw how to solve common errors via the Developer Console.
Congratulations, you now have the foundation to develop efficient, interactive, and professional-grade web applications.